Screen and VoiceOver audio recording on Mac using QuickTime Player.
To make a video recording of the entire screen or just a selected portion of it we use QuickTime player. However, recording audio from VoiceOver doesn’t work out of the box. Let’s see how to achieve that.
Effortlessly Record Your Mac Screen with VoiceOver Audio
QuickTime Player is a free screen recorder for Mac that is generally included as a pre-installed application. You may record anything on your screen with this app. However, the internal audio isn’t passed to QuickTime Player so we need to have an extra solution for that.
BlackHole is a modern MacOS virtual audio loopback driver that allows applications to pass audio to other applications with zero additional latency.
Features:
- Builds 2, 16, 64, 128, 256 audio channels versions
- Customizable channel count, latency, hidden devices
- Customizable mirror device to allow for a hidden input or output
- Supports 8kHz, 16kHz, 44.1kHz, 48kHz, 88.2kHz, 96kHz, 176.4kHz, 192kHz, 352.8kHz, 384kHz, 705.6kHz and 768kHz sample rates
- Zero driver latency
- Compatible with macOS Yosemite (10.10) and newer.
- Builds for Intel and Apple Silicon
A Step-by-Step Guide to Installing and Using QuickTime Player for Screen Recordings with VoiceOver
- Open terminal and install
blackhole-16chpackage from brew repository using following command:brew install blackhole-16chYou should see something like that:
Running `brew update --auto-update`... ==> Auto-updated Homebrew! ==> Updated Homebrew from d1cba00ee to 64f453ee4. No changes to formulae. ==> Downloading https://existential.audio/downloads/BlackHole16ch.v0.5.0.pkg ######################################################################## 100.0% ==> Installing Cask blackhole-16ch ==> Running installer for blackhole-16ch; your password may be necessary. Package installers may write to any location; options such as `--appdir` are ignored. Password: installer: Package name is BlackHole: Virtual Audio Driver 16ch v0.5.0 installer: Installing at base path / installer: The install was successful. blackhole-16ch was successfully installed! - Open QuickTime Player from your Applications folder, then choose File, then New Screen Recording from the menu bar.
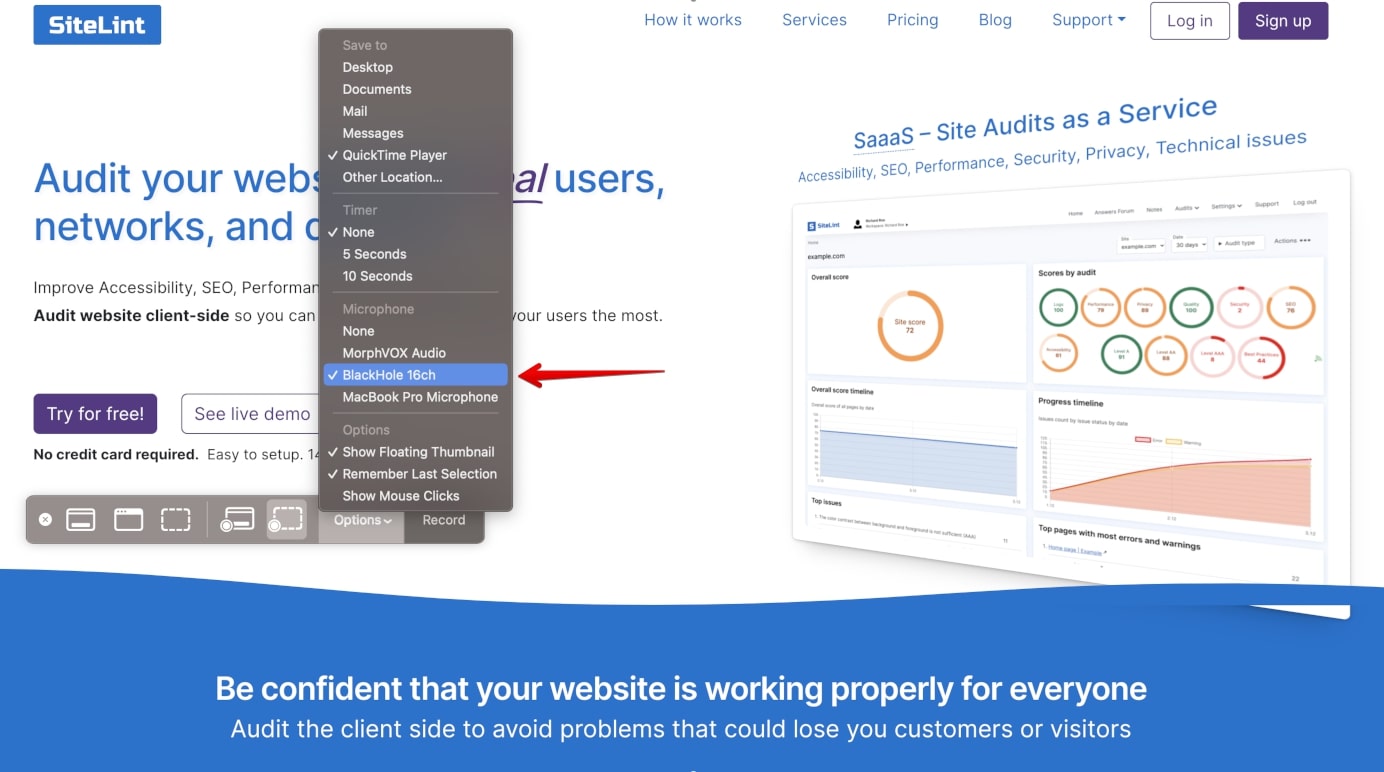
- Then from Options go to the section Microphone and select BlackHole 16ch.
- Finally, activate Record. You may now run VoiceOver.
- To stop recording, activate the Stop Recording button in the menu bar, or press Command–Control–Esc (Escape) or use the Touch Bar.
- After you stop recording, QuickTime Player automatically opens the recording.
Troubleshooting Tips: Why Isn’t My Audio Recording?
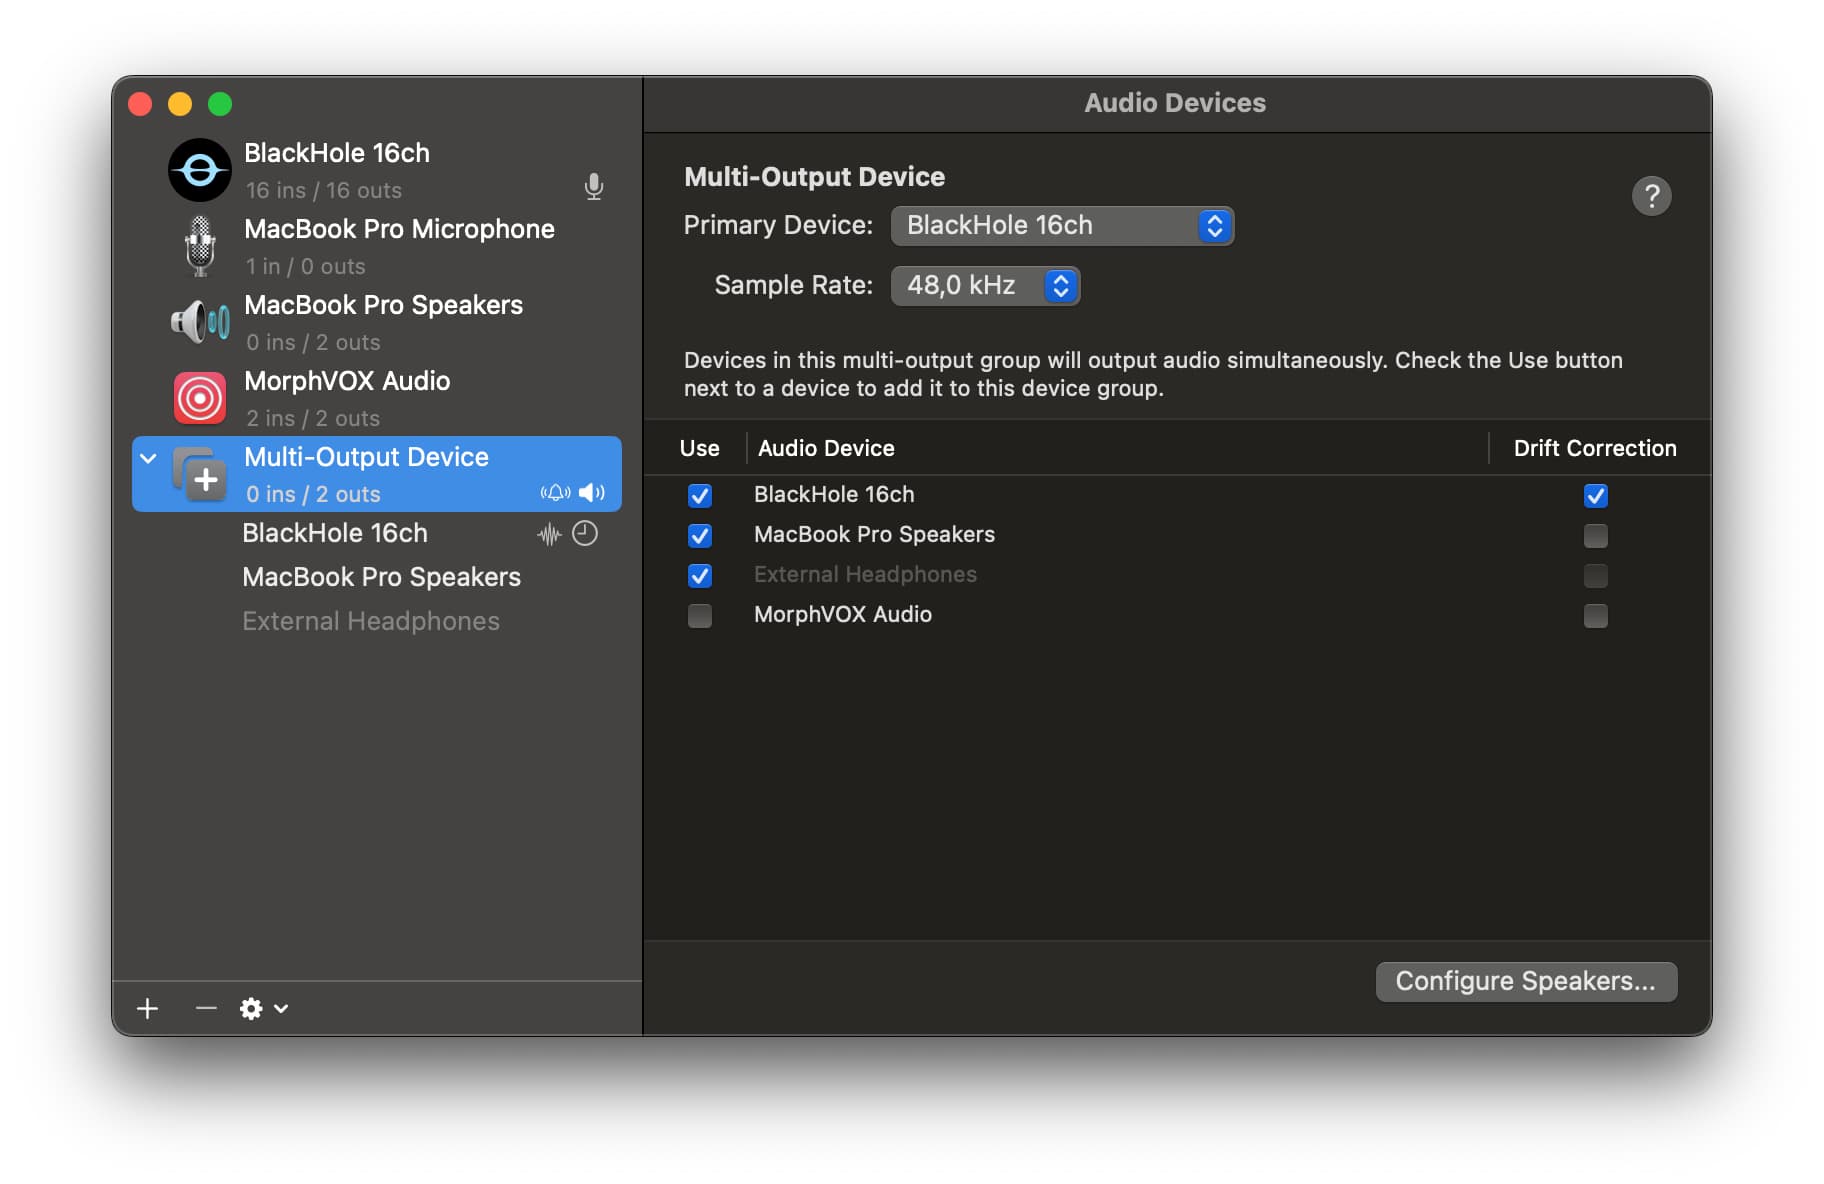
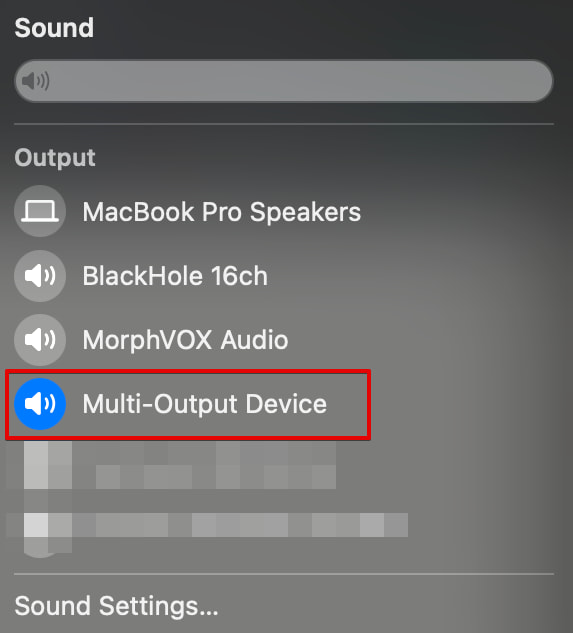
You may need to create Multi-Output Device in order to be able to record audio from the VoiceOver.
There is also an instruction Play audio through multiple devices at once in Audio MIDI Setup on Mac
.
Could not kickstart service “com.apple.audio.coreaudiod”: 1: Operation not permitted
If you upgrading brew packages and you have blackhole-16ch then you may experience the following issue:
Could not kickstart service "com.apple.audio.coreaudiod": 1: Operation not permitted
See the following topic: update(blackhole-2ch): kickstart “com.apple.audio.coreaudiod” Operation not permitted.
Comments